So, I wanted to talk about the design goals that went into the new Runebearer d12 Supers game. (I so need a better name for this thing.) This post will go into how the game works, and what influences the decisions I made.
If you haven't done so already, here is the link to the new game. Enjoy.
First and foremost, Runebearer, and its super hero variant, have always been tactical minis games at their core. d12 Supers is no different. Crunchy, tactical combat that feels super heroic is the main goal of the design. Most everything else, from the way skills are handled, to the design of the powers, works towards this goal. I love role playing and narrative, but I think most of that gets handled by the players at the table. What needs to work and feel right is the battle system.
With that in mind, another big goal is that characters are mechanically different in battle. A character that relies on a fire blast is going to be mechanically different than one that relies on an ice blast, or a mental attack. Characters should have situations they excel in, and others where they meet enemies with abilities they find difficult to deal with.
Another goal would be as simple as possible, but no simpler. I think the previous game was fun, but really clunky. Without sacrificing the above two goals, I would like to reduce the complexity of the game and the bookkeeping required to run it.
Ideally, the game has tons of character building options, and all of them are good some of the time, but none of them are good all of the time. I once played a Champions game where every character had a 20 DEX and a multipower. When it comes to building your character I want lots of variation and lots of choices, and all of those choices should have times when they are awesome and other times where they are negated.
I hope that means that the game is designed for people that like to optimize character builds, but it is ultimately hard to min-max. I have embraced the video-gamey notion of "character builds" and I have lots of min-maxers in my gaming circles. I want making characters to be a fun exercise, and enjoyable to those folks, but I want to avoid obvious solutions. I want choices, and ultimately trade-offs to any build. I want my gamers to email me telling me they spent all week creating and tweaking characters. I want people to say, "If I hadn't used Charisma as my dump stat, I might have won that battle."
So... I want a game with tons of character builds, crunchy tactical super heroic combat, and be pretty simple overall. What does that game look like? I think next post, we should make a character and find out!
Wednesday, September 11, 2019
Tuesday, September 10, 2019
(The New) d12 Supers
So, over 20 years ago, I wrote a fantasy game called Runebearer which became my game of choice for years. For me and my group, it was a great game for the grim and gritty fantasy that we often played. For super heroic adventure, we stuck to Champions. Even though I had grown to have some serious issues with Champions over the years, I couldn't see replacing it. In my mind, supers games just had too many power combinations and fiddly bits to try to create something. I had adapted Runebearer to western, sci-fi, and pulp settings, but I would never write a supers game.Until I did... I adapted Runebearer to a super hero setting. But man, it was clunky. There were tons of stats and skills and talents and modifiers and special cases. It was fun (I personally enjoy fiddly games, so take that with a grain of salt), but it was a mess.
I am in the process of rewriting Runebearer to streamline it and cut out unneeded complexity, and along with that, came the task of reimagining the super hero game. It is a ton of work, but I am at a playable state, and wanted to get it "out there". It's not 100% finished, and certainly isn't perfect, but it is getting there.
Here is the link to the docs, please enjoy them.
Monday, September 9, 2019
Playing (and Scheming) Above the Table
Last post I talked about Wolverine vs. Cyclops, which is shorthand for playing your character for yourself, or playing for the others at the table. Almost always, I want players to be playing for the rest of the table. I want people to think before they take action, "Is this going to be entertaining for everyone at the table, or just me?"
At first glance, this might seem like it precludes selfish and scheming characters. It depends. If your goal was to create a character to get one over on your fellow players, then yeah, I don't think I want that character in the group.
However, if you want to play the bad guy who redeems himself, the scoundrel with a heart of gold, or the villain who is reluctantly forced to roll with the heroes, I think there is lots of room to operate. You just need to keep in mind, "Is this going to be entertaining to everyone at the table?"
One way I have thought to enforce this is, as the GM, to stop accepting secret notes and directions from the players. If they want to perform an action, they have to state it at the table, out loud, in front of everyone. This means that every player is in on the plot, even if their characters would be opposed to it.
I think this avoids a couple things. First, it cuts off the most egregious examples of selfish play. If something is really offensive, or will tear the party asunder, someone can step in before the action is taken and voice their concern. If one player's thief is planning to steal from the group, another player can step in and state, "That's not OK, and if we find out, we are leaving you on the side of the road."
Second, it avoids one of the pitfalls of PvP play, which is opposed skill rolls. If your thief is going to palm some coins, one of the other players may ask to make a spot check. If your schemer is lying to the group, someone might think to ask for a sense motive check. Of course, the GM will have to adjudicate whether or not anyone will be able to make the opposed skill check. What you don't want is to allow an action in secret, and then another player finds out, and feels cheated because he could have made a skill roll to detect the subterfuge.
You do open the door to some huge metagaming (which you still get as soon as the first secret note is passed). Remember though, what we are shooting for is enforcing the rule that any intra-group plots and schemes are entertaining. Scheming above the table eliminates much of the risk that one character's secret plans derail the entire campaign. Scheming above the table means that all the players are in on the plot -- they agree to allow that plot into the story. When everyone is OK with a character's shenanigans, I think metagaming becomes less of a problem.
Friday, September 6, 2019
Wolverine vs. Cyclops (or Why Your Games Keep Imploding)
When I visit my local game store, the discussion often turns to unhappy gamers, unhappy GMs, and to games that have recently imploded. Such-and-such is unhappy with their game, and is looking to drop it. More often than not, these discussions are laden with anecdotes about one or more players behaving badly, min-maxing to the point where the GM is miserable, hogging the spotlight, or maybe even actively working against the team's goals.The problem here is a simple one -- Everyone wants to be Wolverine; No one wants to be Cyclops!
At the gaming table, it seems that everyone wants to be the mysterious loner, who wins the battle single-handed, and quips about killing, and loneliness, before walking off into the sunset, alone, to contemplate his tortured psyche... something, something, alone.
Everyone wants to out-cool everyone else, and no one wants to be left as the steady, solid, team player. Who makes the plan, and sticks with it, even though he isn't the main focus, to beat the bad guys with the help of his team, with which he has a quick beer, before heading home to bed, with his wife... who is way out of his league... and secretly pines for the loner bad boy.
![]() |
| Unless the accountant is also a bad-ass |
Unfortunately, the Wolverine archetype, when played poorly, is also sort of a disaster on a team. When he meets his prospective teammates, he won't step out of the shadows, and will only give vague, mysterious answers to their questions... bonus points if the answers are passive-aggressive. In battle, he is trying to out cool everyone, avoiding moves that help the team, and going for things that will prove just how much better he is than everyone else. Bonus points here if he is min-maxed so as to be better than everyone else. When adventuring, he is the guy who wants to scout ahead alone, maybe take out a guard or two (or even the big boss), or steal the macguffin all by himself. Bonus points if he withholds information or steals from the party because, "That's what my character would do."
![]() |
| Thanks to: http://clipart-library.com |
Gaming groups work when the players realize that their main goal is to play their characters such that they entertain each other, and the GM. Not to be cool. Not to stay true to character. Not even to beat the scenario and become rich and powerful. You can indeed do all those things, but the main goal is to entertain the other players at the table. That means everyone gets to be cool. Everyone gets their moment. Everyone gets their opportunity to contribute to a battle, and indeed, when you pick your moves, you pick the ones that bring the team closer to victory, even if your individual kill count suffers.
None of this means you can't play a bad-ass, or heck, even a misanthropic jackass. It just means that whatever your character concept, make it work in the context of the game, and the party. You can always think of one reason why your angry loner would work with the group, and if you can't, ask the other players for ideas, or ask the GM to give you a reason.
If your character idea is going to cause conflict, run it by your GM and fellow players. Your character might be working against his party, but you, as a player, should not be working against the other players at your table. If your idea isn't going to be fun -- for everyone -- don't even roll him up.
Anyway, this is a long way of saying, "Don't be a selfish player," so I'll be moving along now.
Friday, August 23, 2019
Dice and Superheroes (or why elegant and powerful systems sometimes suck)
And, though HERO always got knocked for being complex, it was pretty damn elegant for what it was trying to do -- which was to mechanically simulate the range of powers you see in the comics, while keeping everything balanced so that characters could interact in tactical combat.
The beauty of HERO is that it takes all those wonky super powers, breaks them down, and then categorizes their effects. You have a fire blast? Well that is just an Energy Blast effect. You fire webs out of your wrists? That is an Entangle effect. All these effects come together, along with Advantages and Limitations, to make your unique powers. It really is a pretty cool concept... and yeah, character creation is somewhat of an accounting exercise, but the end result is worth it.
So, with this powerful tool in my gaming group's toolbox, we would never need another superhero game again.
Or would we?
Well no. Not for a dozen or so years, in any case. I ran the heck out of HERO/Champions. All through high school, college, and a good portion of my adult GMing life, I ran some version of HERO System. It served me very well, for a very long time. It was a great game (and still is).
But, after such a long run, you get to know a system, maybe a little too well. The warts start to show, and after so many years, the warts become a focus. Champions is an elegant and powerful supers system, but that ability to do everything, with as few mechanics as it does, comes with a price. Mainly that, though you can make any character with any power in HERO, mechanically, a lot of those characters and powers end up being 90% the same.
Without going into the details of how HERO works, let's take a simple example of a Fire Blast, and an Ice Blast. Both of these powers may have been built with the effect of Energy Blast. Each might be made unique by attaching some limitations to it -- so for instance, the fire blast could be weaker in the rain, while the ice blast cannot be used in 100 degree heat. These limitations make the powers cheaper to buy, and are up to the player to purchase. (Which you often do, because cheaper!) However, in many cases, beyond a few limitations, these powers behave identically on the battlefield.
On one hand, this is great. I only need a single set of rules to handle fire, ice, lightning blasts, etc. This is a strength, not a weakness. But on the other hand, once I am through making a few of these blasters, and I start to look closely at them, I see that many of them have similar powers, and play pretty much the same. Beyond a few minor differences, often relying on GM fiat ("The temperature today... um 97 degrees... woo hoo ice attacks all around!!"), my fire blaster, with his Fire Blast, Flaming Shroud Armor, and Fire Burst Flash Attack, plays pretty close to my ice blaster, with an Ice Blast, Ice Block Armor, and Blizzard Flash Attack.
Some of this is lack of imagination, certainly... can't we build an Ice Blast that say does damage AND freezes your opponent so that they can't move?
You can, and HERO gives you tools to do this. For instance, you could have a power that incorporated an Energy Blast, and a Drain effect -- or Energy Blast and Entangle. And that would sort of work. The issue there becomes one of campaign limits on powers -- to add the secondary effect of the Entangle, you would have to reduce the effect of the Blast. Often, you are left with a crappy version of each -- a Blast that damages no one, and an Entangle that holds no one. You should have just bought two separate powers and each would have been more effective.
So besides dissing my estranged ex-game, what is my point? My point is that sometimes, you can create a system that is elegant, but by making the mechanics of the game cleaner, you have reduced variation. You may be able to simulate more powers, with fewer rules, but in play, those "unique" powers end up feeling very much alike.
Elegance vs. Variations -- In the case of Champions, abstracting all of the blast powers into a single effect, means that you have to work harder to make those blasts different. At their base, they are mechanically the same. On the other extreme, you might have a game where every power is listed separately, and has different mechanics. Your fire and ice blasts are entirely unique powers... but now, what about the guy who uses lightning, or fires concentrated bubbles of time at his opponent? You have just created a game with 900 powers, and probably an unbalanced mess.
All of this is a lead up to me saying I have written a superhero game, based on the core Runebearer concepts. In the coming days, I will be posting here to discuss it... and to explain my unbalanced mess.
Labels:
Champions,
design,
game design,
games,
Hero System,
rpg
Monday, May 18, 2015
Magic Realm Combat 4 -- Deploying Natives
This is the first part of a larger tutorial:
Today, we are going to go through the mechanics of deploying natives and how it differs from luring with natives. Besides horses and spell casting, deploying natives probably trips more people up than anything else in Magic Realm. Deploying natives isn't hard, but there are a few strange bits in the rules, so we'll go slowly and try to make everything clear.
The Maiden and the Dragon
Before we do that, let's ponder a match up between the Woods Girl and the Tremendous Flying Dragon. The Tremendous Flying Dragon is a powerful beast, strong enough to kill even the stoutest of warriors in the realm, while still being quick enough to evade their blows. Even though the Woods Girl can undercut the dragon and can do enough damage to kill it, this battle is generally a bad idea for her. Unless she is hidden, she should run. Why?
Both giants and dragons get extra attacks. The giants have their massive clubs, and the dragons have their heads. This means that, even though it cannot undercut the Woods Girl, the Tremendous Dragon will have two chances to intercept her maneuver, doing either medium or tremendous damage -- enough to kill our heroine either way.
Of course, the Woods Girl brings her formidable bow to the battle, and when it is alerted, she attacks with the incredible time of 1. This means she will undercut the dragon and harm it before it even reaches her, right? Except now, she is subject to a roll on the Missile Table. An alerted bow normally does L** damage. Because the dragon is armored, one star will come off that damage, so we are doing L*. We need to do H* harm to kill the creature, so we will need a two-level damage increase -- meaning we have to roll a 1. Thankfully, because of the Woods Girl's skill at archery, she rolls a single die on the Missile Table, so her chance of increasing her harm to the needed level is 1/6 (versus 1/36).
Those are terrible odds -- our adventuress has a 1/6 chance of killing the dragon and a 5/9 chance of being killed every round.
A Hail of Arrows
To give the Woods Girls more of a chance, we are going to have her bring her allies, the Woodfolk, to the battle. The Woodfolk is a group of three archers, two are similar in power to the Woods Girl, doing L** damage on a hit. However, the leader has a medium bow and so his damage is M**.
This changes things considerably. Instead of one chance of killing the dragon, we now have 4 shots at him. Like the Woods Girl, the native archers roll only a single die on the Missile Table, which means a roll of a 1 (or a 1 or 2 in the leader's case) kills the dragon. Better odds than before, for certain, but to get those odds, we are going to have to learn how to deploy these natives to the battle.
Luring vs. Deploying
In our last combat tutorial post, we used a hireling to lure a troll, allowing the Black Knight to score some fairly easy kills. Deploying is very similar to luring in that it allows us to use our hirelings to attack (and be attacked by) monsters. However, the two actions are different in some pretty important ways.
Luring
Notice we placed each archer dark-side up. This is because archer natives don't attack at all light-side up, and we need as many attacks as possible for this tactic to work. Now, we can't actually control if they stay dark-side up or not, but we know that the roll to change tactics is a 6 -- which comes up about 30% of the time in Magic Realm. Placing our archers dark-side up to begin the round gives them a 70% chance to stay that way through the end of the round.
Next thing we will do is alert the Woods Girl's bow with a FIGHT L4. Since she has no enemies on her sheet, any FIGHT chit will do. We then assign the Woods Girl's target and move onto the Position phase.
It does not really matter where we position our forces this combat. Each archer will either undercut the Dragon, or not attack at all. Our attacks are all longer and faster than the Dragon's and so we will get the first shots. We have set this combat up so that all of our attacks get a chance to kill the Dragon. However, if none of our attacks kill the Dragon, it has a 2/3 chance of smoking poor, brave W1. All in all, we end up with a 43% chance of killing the dragon this round, a 38% chance of losing a hireling, and a 19% chance of no one dying.
Not awesome odds... but better than before.
So what happened? Well, first let's look at the repositioning rolls. Notice that the hirelings on the right-hand side share a single reposition roll, while the target hireling on the bottom gets his own roll. Mainly, this tells you to spread out your hirelings in the attack circles to maximize your chance to hit.
In this case, it didn't matter because as you can see, both natives on the right rolled a 6 on their change tactics roll, so they flipped and didn't attack at all. W1 rolled a 3 to change tactics, so he stayed dark-side up, undercutting the dragon. His missile roll was a 1, which increased his harm to H*, killing the beast!
We lucked out and won this fight without losing a single archer. Of course, there was no guarantee things would go so smoothly. The odds were barely in our favor Round 1, and if W1 died, the chances would shift in favor of the Dragon and pretty quickly spiral out of control.
I think I will end this one here. There is a little more to cover about deploying, but this has been stuck as a draft for a couple of weeks, so I want to get it out there. Keep checking back for more Magic Realm combat posts. In the near future, we will cover magic... and the even more mysterious horses!
Today, we are going to go through the mechanics of deploying natives and how it differs from luring with natives. Besides horses and spell casting, deploying natives probably trips more people up than anything else in Magic Realm. Deploying natives isn't hard, but there are a few strange bits in the rules, so we'll go slowly and try to make everything clear.
The Maiden and the DragonBefore we do that, let's ponder a match up between the Woods Girl and the Tremendous Flying Dragon. The Tremendous Flying Dragon is a powerful beast, strong enough to kill even the stoutest of warriors in the realm, while still being quick enough to evade their blows. Even though the Woods Girl can undercut the dragon and can do enough damage to kill it, this battle is generally a bad idea for her. Unless she is hidden, she should run. Why?
Both giants and dragons get extra attacks. The giants have their massive clubs, and the dragons have their heads. This means that, even though it cannot undercut the Woods Girl, the Tremendous Dragon will have two chances to intercept her maneuver, doing either medium or tremendous damage -- enough to kill our heroine either way.
Of course, the Woods Girl brings her formidable bow to the battle, and when it is alerted, she attacks with the incredible time of 1. This means she will undercut the dragon and harm it before it even reaches her, right? Except now, she is subject to a roll on the Missile Table. An alerted bow normally does L** damage. Because the dragon is armored, one star will come off that damage, so we are doing L*. We need to do H* harm to kill the creature, so we will need a two-level damage increase -- meaning we have to roll a 1. Thankfully, because of the Woods Girl's skill at archery, she rolls a single die on the Missile Table, so her chance of increasing her harm to the needed level is 1/6 (versus 1/36).
Those are terrible odds -- our adventuress has a 1/6 chance of killing the dragon and a 5/9 chance of being killed every round.
A Hail of Arrows
To give the Woods Girls more of a chance, we are going to have her bring her allies, the Woodfolk, to the battle. The Woodfolk is a group of three archers, two are similar in power to the Woods Girl, doing L** damage on a hit. However, the leader has a medium bow and so his damage is M**.
This changes things considerably. Instead of one chance of killing the dragon, we now have 4 shots at him. Like the Woods Girl, the native archers roll only a single die on the Missile Table, which means a roll of a 1 (or a 1 or 2 in the leader's case) kills the dragon. Better odds than before, for certain, but to get those odds, we are going to have to learn how to deploy these natives to the battle.
Luring vs. Deploying
In our last combat tutorial post, we used a hireling to lure a troll, allowing the Black Knight to score some fairly easy kills. Deploying is very similar to luring in that it allows us to use our hirelings to attack (and be attacked by) monsters. However, the two actions are different in some pretty important ways.
Luring
- In a given combat round, a hireling can lure a single monster
- Conversely, a monster can only be lured by a single hireling, so you cannot make two hirelings attack the same enemy by luring
- A lured monster is placed on the hireling's combat sheet
- The lured monster will attack the hireling whose sheet it is on
- A hireling on his own combat sheet does not reposition, or change tactics -- you choose what box he is in and which side he fights on, and those don't change
- A hireling who lures a monster instantly becomes unhidden -- there is no way for a hidden hireling to attack an enemy without reprisal
Deploying
- In a given combat round, a hireling can be deployed to a single monster
- However, any number of hirelings can be deployed to the same monster -- any number of hirelings can attack the same monster by deploying
- Deployed natives are placed on the monster's combat sheet
- The monster will attack one of the hirelings deployed to his sheet -- this will be the last hireling deployed to its sheet
- A hireling on an enemy's sheet repositions and rolls to change tactics -- you cannot guarantee which maneuver is used, or which side his chit will be played on
- A hireling who is deployed to a monster instantly becomes unhidden -- there is no way for a hidden hireling to attack an enemy without reprisal
Generally, what these rules mean is that if you can manage with a one-on-one battle between each hireling and a single enemy, you should lure, because you can then control the hireling's maneuver and whether they play light or dark side up. If you need multiple hirelings attacking a single creature, you need to deploy, but you lose the ability to control their maneuver and chit side -- once you deploy your hireling, they behave randomly (just like a monster) that combat round.
The Battle
So, let's run this battle and see what happens.
| The Start of the Battle |
I am not going to lure, so the monster will be "randomly" assigned to me. I will then deploy my native hirelings to the Tremendous Flying Dragon's sheet one at a time in the order (WHQ, W2, W1). Let's do this and see how our combat screen looks after.
| Dragon's Sheet After Deployment |
A couple things happened here. First thing is, the Dragon was taken off the Wood Girl's sheet and put on its own sheet. It is no longer going to attack the Woods Girl this round, instead it will attack the last hireling deployed to its sheet. As I deployed the Woodfolk, they went on the Dragon's sheet and you can see the order by looking at the blue section of the image. As I deployed them, they appeared from left to right -- WHQ, W2 and finally W1. Because W1 was the last hireling placed on the Dragon's sheet, he becomes the Dragon's target this round.
Notice we placed each archer dark-side up. This is because archer natives don't attack at all light-side up, and we need as many attacks as possible for this tactic to work. Now, we can't actually control if they stay dark-side up or not, but we know that the roll to change tactics is a 6 -- which comes up about 30% of the time in Magic Realm. Placing our archers dark-side up to begin the round gives them a 70% chance to stay that way through the end of the round.
Next thing we will do is alert the Woods Girl's bow with a FIGHT L4. Since she has no enemies on her sheet, any FIGHT chit will do. We then assign the Woods Girl's target and move onto the Position phase.
| Round 1 -- Position Phase |
Not awesome odds... but better than before.
| Round 1 -- Result |
In this case, it didn't matter because as you can see, both natives on the right rolled a 6 on their change tactics roll, so they flipped and didn't attack at all. W1 rolled a 3 to change tactics, so he stayed dark-side up, undercutting the dragon. His missile roll was a 1, which increased his harm to H*, killing the beast!
We lucked out and won this fight without losing a single archer. Of course, there was no guarantee things would go so smoothly. The odds were barely in our favor Round 1, and if W1 died, the chances would shift in favor of the Dragon and pretty quickly spiral out of control.
I think I will end this one here. There is a little more to cover about deploying, but this has been stuck as a draft for a couple of weeks, so I want to get it out there. Keep checking back for more Magic Realm combat posts. In the near future, we will cover magic... and the even more mysterious horses!
Monday, May 4, 2015
Woods Girl Weeks 3 & 4
This post is the first in a set of posts: Part 1, Part 2
And if you liked this, here is a previous let's play with the Amazon!
Day 15
I had to look up the rules for flying a controlled creature and it turns out, you need the creature to be following you for the day to record FLY phases. I intend to fly a bat out of here and see if I can find a safer, more lucrative hunting ground. I am also thinking of getting closer to the Chapel to get my Ashes curse removed and to sell the Sacred Statue. It won't get me into positive VP territory, but I will edge a little closer.
So, I am going to FLY to Nut Woods, because that ensures I will end up in a clearing that will get me to the Chapel, get the bat out of the way, and maybe I will find the Small Campfire there too and have a shot at getting my allies on the board.
Whatever happens, I will head to the Caves to see what lies there, and then to the Chapel to conduct the sale of the Sacred Statue and get my Ashes curse lifted. (The other two controlled bats will end up in Evil Valley just to get them out of the way if I ever return to the Cliff.)
Day 16-17
So, flying to the Nut Woods didn't really pay off. I found the Large Campfire, but that doesn't help me much. I am going to try to get to the Caves and so I record three MOVEs and a HIDE to end up in the Oak Woods. I will then record a MOVE and HIDE to check out the Caves.
Day 18
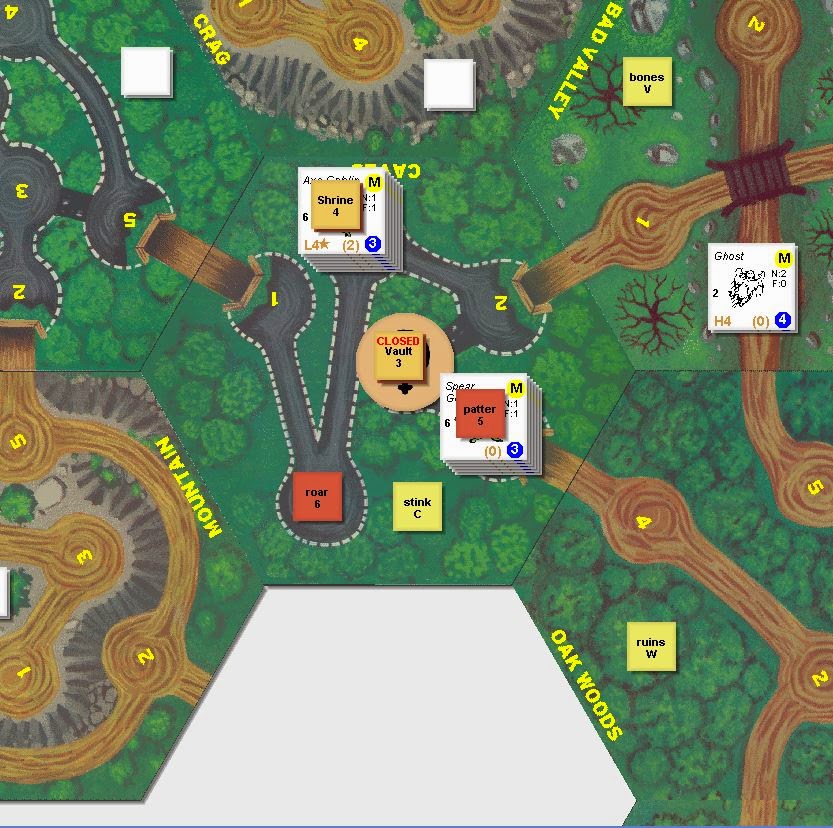
Not sure if my luck can get any worse as far as finding treasure sites. I indeed found the Lost City and two treasure sites. Unfortunately, the one closest to me is the Vault, which I cannot possibly open. At this point, I think I need to try for the Shrine, leaving enough time before the 28th to return to the Chapel.
I head to Caves 3, and search for the passage. Any shot I have to win depends on my finding that passage quickly.
Day 19
Luckily, I manage to find the passage in a single day, so my path to the Shrine open. Unluckily, I also spawn two groups of goblins to the tile, blocking both the Shrine and my way out of here! With that monster roll, I have almost certainly lost the game.
Day 20
Alright, we are in a pretty bad spot, but let's see if we can make something of it before our time runs out. I am going to head northeast into the Bad Valley, see if I can kill the ghosts and then maybe take on the Heavy Dragons and Trolls to pad my score.
I boldly record two MOVES and stride into the Bad Valley. The ghosts are always prowling, so they pounce.
The ghosts have a move speed of 4 which means even unhidden, I can ready my bow with a FIGHT L3*. I am covering my move to protect me from the ghost's attack. Although because it always comes with a random roll, covering your move with a missile weapon is a more dicey proposition -- even undercutting I only kill the ghost 2/3 of the time.
The reposition roll is a 4, so no one moves, and neither box changes tactics. Now, it just depends on my missile roll... which is a 3 for no change. The ghost takes L** harm and dies.
Sweet! Now, I play the identical move on the sole surviving ghost.
Everything goes our way in Round 2 and with a missile roll of 1, we kill the ghost.
The ghosts are dead and we gain 6 Notoriety.
Day 21-22
We quietly make our way to the Heavy Dragons, hoping our luck in battle will hold. On day 22, the Dragons prowl and come to me.
I will take a shot from hiding, hoping to get a kill -- but I have only a 1/3 chance to kill a heavy, armored target, so this is much more dangerous than the ghosts. I roll a 5 for the missile roll and the attack bounces impotently off the Dragon's scales. Worse, the Dragon flipped and with his new move speed of 3, I can no longer alert my bow, so I flee into the woods.
Day 23
I repeat my sneak attack with a similar result. This time the Dragon does not flip and so I will stay for a second round of combat.
We are a little luckier here, and our missile roll is a 1, killing the Dragon. Unfortunately, his buddy flips which will make my life a little harder.
On round 3, we are hoping to avoid the Dragon and miss, thus alerting our bow for round 4. There is a 5/18 chance that I die (or take a serious wound) here. A 1/18 chance to actually kill the Dragon with an errant shot, and a 2/3 chance that my bow is alerted and we move on to the next round.
Ouch... I get hit by the Dragon on its L4 side and take 3 wounds, and my bow is unalerted still. Fortunately, with my tactics as they are, I have quite a few MOVE chits to burn before my situation gets bad.
Round 4 is slightly better and both the Dragon and I miss each other. The Dragon also flips to his H4 side, so we are hopefully ready for a productive round 5.
We are once again hoping for a nice missile roll here... and we get it! A 1 increases our damage to H**, killing the Dragon.
Day 24-25
I am up to 18 Fame and 24 Notoriety from my dragon-slaying exploits. Still, I am short a tiny bit on Fame, and the darn Ashes curse means Gold is a big -10. Not much time left, but I see that the Trolls have left the Ruins, so I am going to make a run (literally, I am not HIDING at all) at the Hoard and see if I can find anything.
Day 26
I do reach Ruins 6 which contains the Hoard. I record 2 SEARCH phases and hope for the best. On the second SEARCH, I find the Hoard. That gives me two days to loot.
Day 27
I find the Eye of the Moon and the Amulet. The Eye is a medium weight treasure, which means it is really too heavy to carry and fight/run at the same time, but I with a single day remaining, am going to take it for the Notoriety and hope nothing attacks.
Day 28
I find... the Flowers of Rest and end the game with a whimper... falling into a blissful slumber. My final score is -12, mostly because of my Gold shortfall.
Conclusion
In retrospect, I probably should have played more aggressively at the beginning of the game, instead of rushing for points at the end.
Also, I am rethinking my previous stand on the ambush rules. If you are playing with standard combat, then bow have one disadvantage that melee combatants do not -- uncertainty. Any given combat round, you can hit your opponent and still suffer from a poor missile roll, and usually that will mean wounds or death. This is something the melee fighters needn't worry about. Using the ambush rule brings the Woods Girl and the Elf into that "Tier 1" fighter category, which I think is a good thing.
| Darn Goblins |
I boldly record two MOVES and stride into the Bad Valley. The ghosts are always prowling, so they pounce.
| Round 1 Setup |
The reposition roll is a 4, so no one moves, and neither box changes tactics. Now, it just depends on my missile roll... which is a 3 for no change. The ghost takes L** harm and dies.
| Round 1 Result |
| Round 2 Start |
| Round 2 Result |
Day 21-22
We quietly make our way to the Heavy Dragons, hoping our luck in battle will hold. On day 22, the Dragons prowl and come to me.
| Round 1 Start |
Day 23
I repeat my sneak attack with a similar result. This time the Dragon does not flip and so I will stay for a second round of combat.
| Round 2 Start |
| Round 2 Result |
Ouch... I get hit by the Dragon on its L4 side and take 3 wounds, and my bow is unalerted still. Fortunately, with my tactics as they are, I have quite a few MOVE chits to burn before my situation gets bad.
Round 4 is slightly better and both the Dragon and I miss each other. The Dragon also flips to his H4 side, so we are hopefully ready for a productive round 5.
| Round 5 Start |
| Round 5 Result |
I am up to 18 Fame and 24 Notoriety from my dragon-slaying exploits. Still, I am short a tiny bit on Fame, and the darn Ashes curse means Gold is a big -10. Not much time left, but I see that the Trolls have left the Ruins, so I am going to make a run (literally, I am not HIDING at all) at the Hoard and see if I can find anything.
Day 26
I do reach Ruins 6 which contains the Hoard. I record 2 SEARCH phases and hope for the best. On the second SEARCH, I find the Hoard. That gives me two days to loot.
Day 27
I find the Eye of the Moon and the Amulet. The Eye is a medium weight treasure, which means it is really too heavy to carry and fight/run at the same time, but I with a single day remaining, am going to take it for the Notoriety and hope nothing attacks.
Day 28
I find... the Flowers of Rest and end the game with a whimper... falling into a blissful slumber. My final score is -12, mostly because of my Gold shortfall.
Conclusion
In retrospect, I probably should have played more aggressively at the beginning of the game, instead of rushing for points at the end.
Also, I am rethinking my previous stand on the ambush rules. If you are playing with standard combat, then bow have one disadvantage that melee combatants do not -- uncertainty. Any given combat round, you can hit your opponent and still suffer from a poor missile roll, and usually that will mean wounds or death. This is something the melee fighters needn't worry about. Using the ambush rule brings the Woods Girl and the Elf into that "Tier 1" fighter category, which I think is a good thing.
Monday, April 27, 2015
Woods Girl Weeks 1 & 2
This post is the first in a set of posts: Part 1, Part 2
And if you liked this, here is a previous let's play with the Amazon!
Today, I am running the Woods Girl through the Magic Realm. The Woods Girl is an archer who plays similarly to the Elf, but with only the barest access to magic. Still, she can be formidable with her Light Bow and when played with her optional "Expert Woodcraft" rule, she can do some damage.
For the most part, I will be playing the base game. Only the following optional rules will be used: Serious Wounds, Watchful Natives, Expert Woodcraft, Birdsong Rearrangement, Persistent Chits. I am not particularly fond of the ambush rule, even though it benefits the Woods Girl quite a bit, so I am playing without it.
I choose to start at the Inn and I take Control Bats as my spell, though I don't assume I will get much use out of it, but we'll see. My VP assignment goes one point Fame, Notoriety and Gold, and though it is a terrible idea, two points in Great Treasures. Our Woods Girl is a Laura Croft wannabe!
Day 1
Here is our map:
It looks as though the Ruins and the Deep Woods are our best bets for early exploration, so we will get ourselves hidden and into the Ruins as soon as possible. I record one TRADE to see what the Rogues have in their dwelling, two HIDES, and then will MOVE into Ruins 2.
My trade with the Rogues reveals an interesting treasure. The Magic Spectacles might be useful to us, but we will need some cash to buy even this inexpensive treasure from the surly Rogues. I make a half-hearted attempt to charm the spectacles from the ne'er-do-wells, but I am rebuffed (no deal), so I skulk out of the inn and make my way to the Ruins.
My hide is successful, and I have uncovered the Hoard in Ruins 6, but two Heavy Trolls block my path. The trolls aren't particularly dangerous to the Woods Girl. They are heavy and armored, which poses a problem -- my bow does L** damage, but the trolls' armor means I need an additional level of damage to score a kill. Looking at the missile table, we see that I will need to roll a 1 or 2 to kill one of these beasts.
So, I am hidden and can take a free shot, but will then have to run back toward the Inn. I will probably have to do this for several days trying to get lucky enough to kill the trolls... all to get to the Hoard, which is a nice site, but it is stuck in a cave clearing. I think the Woods Girl will sneak past these trolls and investigate the Deep Woods.
(Note: This is where the ambush rules would have helped us greatly. Instead of having to flee after a single attack, we would have been able to hide after each shot, only being forced to flee when we failed a HIDE check. Oh well.)
Day 2
The Woods Girl leaves the trolls behind, heading into the Cursed Valley and then into the Deep Woods beyond. I record a MOVE first, to get out of the trolls' clearing, then two HIDES, and then a final MOVE into Deep Woods 2.
Honestly, that was a little underwhelming. The Deep Woods hold no treasure sites, only the promise of dragons and bats. It is definitely not worth hanging out here. I can get to the Ledges from here, or take a longer trip to either the Borderland, or the Cliff. I decide to head northwest to the Ledges on Day 3.
Day 3
Well crap! That stinks. The Ledges are a dead end, both in terms of their geography and their contents -- a few serpents slithering their way through piles of bones, no doubt the remains of former adventurers who were bored to death here!
We are going to have to head back, which is going to cost us at least three days. That Hoard is looking better by the day! But, there is still the Borderland and Cliff to check, so I am going to make my way back through the Deep Woods and try to get to one of those tiles.
The Plan
I am going to make a run for the Borderland. It will take 3 days, and I will have to brave the Ghosts, but they shouldn't be a problem. I will take a HIDE and three MOVES each day in hopes of getting there as soon as possible.
Days 4-6
My trek proves uneventful. I do spot some Heavy Flying Dragons circling the Deep Woods, but decide to avoid them. I also dodge the Ghosts. By the end of day 6, I am in the Borderland with Ruins C and the Cairns... once again stuck in a cave clearing.
Day 7
Again, I have the bad luck of finding a nice treasure location stuck in a cave clearing. And if the goblins show up... without the ambush rules in play, I will likely have to flee. I decide to have a look at the Cliff before mucking around in cave clearings. I make 4 MOVES and get to Awful Valley.
Day 8
I cautiously into the Cliff, hoping to find something worthwhile. I record two MOVES and two HIDES, ending my day in Cliff 3.
Excellent! I find the Lair and the Pool... surrounded by a bunch of nasty red sound chits, but even so, this is a nice find.
Day 9
We will HIDE and then SEARCH three times, hoping to find the Lair and grab some treasure.
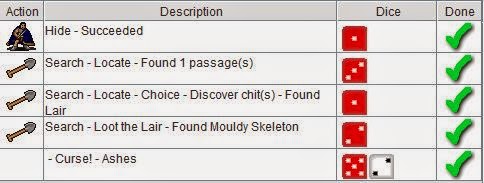
Interesting... we find the passage to the Pool, the Lair and the Mouldy Skeleton all in a single day! The Ashes curse is going to be highly annoying because the Chapel is a long way away... but still this is a good start.
In and of itself, the Mouldy Skeleton isn't too useful a find, since the three artifacts it adds to the treasure site (H helmet, breastplate and shield) are too heavy for the Woods Girl to use. However, they are added to the top of the treasure pile, pushing the rest of the cards down, making them easier to loot. That is a good thing and it means we should get a nice haul tomorrow.
Day 10
I am going to take advantage of our luck and try to get as much treasure out of this site as possible before having to fight or flee. I record one HIDE and three SEARCH phases.
And my luck turns. Even though it is a great treasure and counts toward my victory conditions, the Cloven Hoof adds one to all die rolls in the clearing, making my life just a little harder, and ruining any chance I have to kill the Armored Tremendous Dragon sure to appear. On the other hand, it is at least color magic, and so if a bat were to appear, I could use Control Bats to subdue it. Still, I'd rather not have that die roll penalty here, so I take the Cloven Hoof with the intention of dumping it somewhere safe.
Day 11
I record three MOVES and a HIDE, intending to move into the Awful Valley, drop the Cloven Hoof in one of the clearings there, and then get back to the Lair. Unfortunately, a Giant Bat has some other ideas.
Ugh... as you can see, a monster roll of 6 has brought all the bats to the tile. An unarmored, heavy creature is a 50/50 chance for the Woods Girl's bow, but if that fails, it is a slog -- the bat is fast enough to give the WG trouble and if it flips, she will not be able to run. Still, if she wants to get to the Lair, she is going to have to kill that bat.
Hidden, I am able to alert my bow to the L1** side. I am guaranteed to hit and a 3 or less on a single die will kill the bat. And... a 5. I hit, do light damage and unalert my bow. Now, we can either run and return tomorrow with the same strategy, or we can fight on, hoping to survive round 2 until we can ready our bow again.
I am 11 days in and I have killed nothing, and found very little. I am feeling a bit crappy about how this run has gone so far, I am going to risk it. The bat will kill me 1/3 of the time on round 2. If I survive, I have another shot at it.
I play a MOVE L2** to ensure I don't get undercut, and any FIGHT with no asterisks will do. Any box will do, too... but I am superstitious about putting my maneuver in the same box as an enemy I am trying to avoid, so I Duck.
The bat does not change boxes, but he does flip. I miss and my bow alerts. I have to fatigue a MOVE L3* and we are onto round 3.
Unless the bat flips again, I can no longer run. However, I am alerted, so a FIGHT M5 will work as well as anything else. I play a MOVE L2** to ensure I don't get undercut if the bat flips, and my missile roll goes awry.
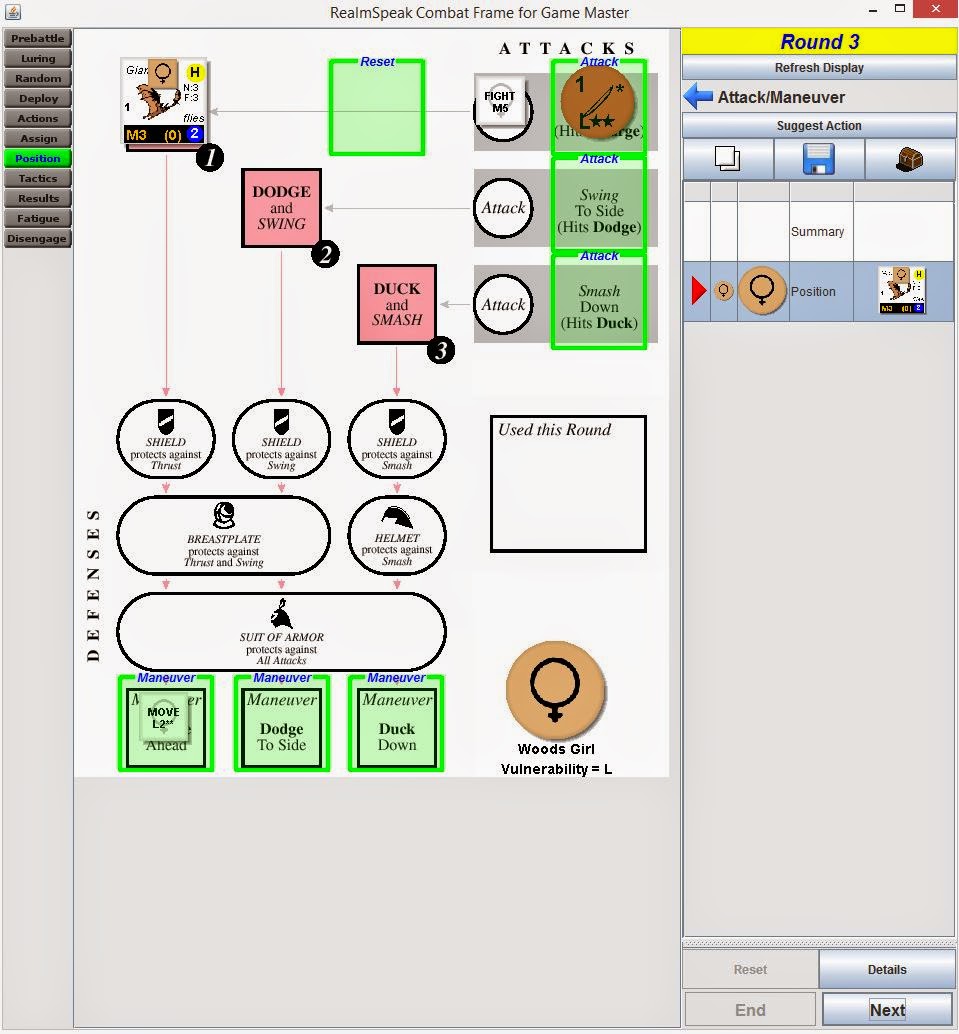
Finally, I undercut the bat and roll a 1 on the missile table, skewering it!
All that work for 3 fame and notoriety. I fatigue another MOVE chit and we can move to the Lair tomorrow.
Day 12
I am hoping that another monster roll of 6 will hold off until day 14, when I can use Control Bats to fly them far, far away. In the meantime, my path to the Lair is clear. I record two HIDEs, a MOVE and a SEARCH, hoping to grab a little more loot.
I loot the Sacred Statue, but both hides fail and I am staring down the angry, flaring nostrils of the Tremendous Dragon. I flee... and need to reconsider my choice of treasure sites.
Day 13
Where to go? I do have a good chance of extracting one more treasure from the Lair, and if I can survive day 13, I might be able to figure out a good use of the bats on day 14. Otherwise, I need to find greener (and less dangerous) pastures and frankly, I am not sure where those would be. It seems the other treasure sites are locked away in caves or far away mountain clearings. I have already spent too much time running from tile to tile without gaining any victory points, so let's stick around one more day and see what happens.
So, I MOVE, HIDE, MOVE, SEARCH, hoping to sneak back into the Lair and swipe a treasure. Everything succeeds nicely, and I pull the Elven Slippers from the treasure pile. The Slippers are a nice treasure for the Woods Girl, giving her an L2 MOVE without any asterisks. I also manage to spawn the second Giant.
I could try to kill the Giant from hiding, and would do so on a 1 or 2. Then I would have to flee the clearing, back into the Awful Valley. Of course, my ultimate goal is to be in a bat clearing on day 14, so I don't want to ruin that chance. Regardless of what I do, my ability to get to the bats is going to hinge on a single HIDE roll. I decide to take my shot at the Giant.
Alas, the missile roll is not with me, and my attack decreases 2 levels, and thuds harmlessly into the Giant's toe. I do little more than anger him... then run.
Day 14
As the second week comes to a close, I have Grey magic in every clearing. I am thinking that I could sneak past the Giant and the Dragon and end my day in the clearing with the Bats. I can cast Control Bats that evening and spend day 15 flying south to the Order to sell the Sacred Statue and get my Ashes curse removed. Still, that will leave me hurting for victory points. It might be prudent to stop in the Caves first to see if there is anything of interest there.
Nonetheless, I need to get to the Bats first, and that all hinges on a HIDE roll...
Excellent! I get to the Bats, wait until evening, cast my spell and I am ready to fly! Tomorrow.
And if you liked this, here is a previous let's play with the Amazon!
Today, I am running the Woods Girl through the Magic Realm. The Woods Girl is an archer who plays similarly to the Elf, but with only the barest access to magic. Still, she can be formidable with her Light Bow and when played with her optional "Expert Woodcraft" rule, she can do some damage.
For the most part, I will be playing the base game. Only the following optional rules will be used: Serious Wounds, Watchful Natives, Expert Woodcraft, Birdsong Rearrangement, Persistent Chits. I am not particularly fond of the ambush rule, even though it benefits the Woods Girl quite a bit, so I am playing without it.
I choose to start at the Inn and I take Control Bats as my spell, though I don't assume I will get much use out of it, but we'll see. My VP assignment goes one point Fame, Notoriety and Gold, and though it is a terrible idea, two points in Great Treasures. Our Woods Girl is a Laura Croft wannabe!
Day 1
Here is our map:
It looks as though the Ruins and the Deep Woods are our best bets for early exploration, so we will get ourselves hidden and into the Ruins as soon as possible. I record one TRADE to see what the Rogues have in their dwelling, two HIDES, and then will MOVE into Ruins 2.
My trade with the Rogues reveals an interesting treasure. The Magic Spectacles might be useful to us, but we will need some cash to buy even this inexpensive treasure from the surly Rogues. I make a half-hearted attempt to charm the spectacles from the ne'er-do-wells, but I am rebuffed (no deal), so I skulk out of the inn and make my way to the Ruins.
My hide is successful, and I have uncovered the Hoard in Ruins 6, but two Heavy Trolls block my path. The trolls aren't particularly dangerous to the Woods Girl. They are heavy and armored, which poses a problem -- my bow does L** damage, but the trolls' armor means I need an additional level of damage to score a kill. Looking at the missile table, we see that I will need to roll a 1 or 2 to kill one of these beasts.
So, I am hidden and can take a free shot, but will then have to run back toward the Inn. I will probably have to do this for several days trying to get lucky enough to kill the trolls... all to get to the Hoard, which is a nice site, but it is stuck in a cave clearing. I think the Woods Girl will sneak past these trolls and investigate the Deep Woods.
(Note: This is where the ambush rules would have helped us greatly. Instead of having to flee after a single attack, we would have been able to hide after each shot, only being forced to flee when we failed a HIDE check. Oh well.)
Day 2
The Woods Girl leaves the trolls behind, heading into the Cursed Valley and then into the Deep Woods beyond. I record a MOVE first, to get out of the trolls' clearing, then two HIDES, and then a final MOVE into Deep Woods 2.
Honestly, that was a little underwhelming. The Deep Woods hold no treasure sites, only the promise of dragons and bats. It is definitely not worth hanging out here. I can get to the Ledges from here, or take a longer trip to either the Borderland, or the Cliff. I decide to head northwest to the Ledges on Day 3.
Day 3
Well crap! That stinks. The Ledges are a dead end, both in terms of their geography and their contents -- a few serpents slithering their way through piles of bones, no doubt the remains of former adventurers who were bored to death here!
We are going to have to head back, which is going to cost us at least three days. That Hoard is looking better by the day! But, there is still the Borderland and Cliff to check, so I am going to make my way back through the Deep Woods and try to get to one of those tiles.
The Plan
I am going to make a run for the Borderland. It will take 3 days, and I will have to brave the Ghosts, but they shouldn't be a problem. I will take a HIDE and three MOVES each day in hopes of getting there as soon as possible.
My trek proves uneventful. I do spot some Heavy Flying Dragons circling the Deep Woods, but decide to avoid them. I also dodge the Ghosts. By the end of day 6, I am in the Borderland with Ruins C and the Cairns... once again stuck in a cave clearing.
| The Woods Girl's Trek |
Again, I have the bad luck of finding a nice treasure location stuck in a cave clearing. And if the goblins show up... without the ambush rules in play, I will likely have to flee. I decide to have a look at the Cliff before mucking around in cave clearings. I make 4 MOVES and get to Awful Valley.
Day 8
I cautiously into the Cliff, hoping to find something worthwhile. I record two MOVES and two HIDES, ending my day in Cliff 3.
Excellent! I find the Lair and the Pool... surrounded by a bunch of nasty red sound chits, but even so, this is a nice find.
Day 9
We will HIDE and then SEARCH three times, hoping to find the Lair and grab some treasure.
Interesting... we find the passage to the Pool, the Lair and the Mouldy Skeleton all in a single day! The Ashes curse is going to be highly annoying because the Chapel is a long way away... but still this is a good start.
In and of itself, the Mouldy Skeleton isn't too useful a find, since the three artifacts it adds to the treasure site (H helmet, breastplate and shield) are too heavy for the Woods Girl to use. However, they are added to the top of the treasure pile, pushing the rest of the cards down, making them easier to loot. That is a good thing and it means we should get a nice haul tomorrow.
Day 10
I am going to take advantage of our luck and try to get as much treasure out of this site as possible before having to fight or flee. I record one HIDE and three SEARCH phases.
And my luck turns. Even though it is a great treasure and counts toward my victory conditions, the Cloven Hoof adds one to all die rolls in the clearing, making my life just a little harder, and ruining any chance I have to kill the Armored Tremendous Dragon sure to appear. On the other hand, it is at least color magic, and so if a bat were to appear, I could use Control Bats to subdue it. Still, I'd rather not have that die roll penalty here, so I take the Cloven Hoof with the intention of dumping it somewhere safe.
Day 11
I record three MOVES and a HIDE, intending to move into the Awful Valley, drop the Cloven Hoof in one of the clearings there, and then get back to the Lair. Unfortunately, a Giant Bat has some other ideas.
Ugh... as you can see, a monster roll of 6 has brought all the bats to the tile. An unarmored, heavy creature is a 50/50 chance for the Woods Girl's bow, but if that fails, it is a slog -- the bat is fast enough to give the WG trouble and if it flips, she will not be able to run. Still, if she wants to get to the Lair, she is going to have to kill that bat.
Hidden, I am able to alert my bow to the L1** side. I am guaranteed to hit and a 3 or less on a single die will kill the bat. And... a 5. I hit, do light damage and unalert my bow. Now, we can either run and return tomorrow with the same strategy, or we can fight on, hoping to survive round 2 until we can ready our bow again.
I am 11 days in and I have killed nothing, and found very little. I am feeling a bit crappy about how this run has gone so far, I am going to risk it. The bat will kill me 1/3 of the time on round 2. If I survive, I have another shot at it.
I play a MOVE L2** to ensure I don't get undercut, and any FIGHT with no asterisks will do. Any box will do, too... but I am superstitious about putting my maneuver in the same box as an enemy I am trying to avoid, so I Duck.
| Round 2 |
The bat does not change boxes, but he does flip. I miss and my bow alerts. I have to fatigue a MOVE L3* and we are onto round 3.
Unless the bat flips again, I can no longer run. However, I am alerted, so a FIGHT M5 will work as well as anything else. I play a MOVE L2** to ensure I don't get undercut if the bat flips, and my missile roll goes awry.
| Round 3 |
| Round 3 Result |
Day 12
I am hoping that another monster roll of 6 will hold off until day 14, when I can use Control Bats to fly them far, far away. In the meantime, my path to the Lair is clear. I record two HIDEs, a MOVE and a SEARCH, hoping to grab a little more loot.
I loot the Sacred Statue, but both hides fail and I am staring down the angry, flaring nostrils of the Tremendous Dragon. I flee... and need to reconsider my choice of treasure sites.
Day 13
Where to go? I do have a good chance of extracting one more treasure from the Lair, and if I can survive day 13, I might be able to figure out a good use of the bats on day 14. Otherwise, I need to find greener (and less dangerous) pastures and frankly, I am not sure where those would be. It seems the other treasure sites are locked away in caves or far away mountain clearings. I have already spent too much time running from tile to tile without gaining any victory points, so let's stick around one more day and see what happens.
So, I MOVE, HIDE, MOVE, SEARCH, hoping to sneak back into the Lair and swipe a treasure. Everything succeeds nicely, and I pull the Elven Slippers from the treasure pile. The Slippers are a nice treasure for the Woods Girl, giving her an L2 MOVE without any asterisks. I also manage to spawn the second Giant.
I could try to kill the Giant from hiding, and would do so on a 1 or 2. Then I would have to flee the clearing, back into the Awful Valley. Of course, my ultimate goal is to be in a bat clearing on day 14, so I don't want to ruin that chance. Regardless of what I do, my ability to get to the bats is going to hinge on a single HIDE roll. I decide to take my shot at the Giant.
Alas, the missile roll is not with me, and my attack decreases 2 levels, and thuds harmlessly into the Giant's toe. I do little more than anger him... then run.
Day 14
As the second week comes to a close, I have Grey magic in every clearing. I am thinking that I could sneak past the Giant and the Dragon and end my day in the clearing with the Bats. I can cast Control Bats that evening and spend day 15 flying south to the Order to sell the Sacred Statue and get my Ashes curse removed. Still, that will leave me hurting for victory points. It might be prudent to stop in the Caves first to see if there is anything of interest there.
Nonetheless, I need to get to the Bats first, and that all hinges on a HIDE roll...
| Success |
Tuesday, April 14, 2015
Magic Realm Combat 3 -- Luring with Natives
This is the first part of a larger tutorial:
Quick tutorial today... we are going to battle with some natives on our side and talk about luring, deploying and battling on multiple sheets. Like last post, I am going to use RealmSpeak to manage the fight, which will make it a little easier on me... at the expense of being able to control the rolls. We'll see how it goes.
For the first battle, we are going to pit the Black Knight against two Heavy Trolls. This is a pretty good fight for the BK, though I would expect him to take a hit or two if he starts the battle unhidden. With a hireling, we should fare a little better. Let's give the BK a rogue companion and see how we can use him.
One way we can use hirelings is to lure enemies onto their combat sheet, tricking the monsters into attacking them instead of us. Every hireling you have can lure a single enemy to his sheet each combat round. Having a native lure an enemy can save us wounds and fatigue, and to allow us to ignore our defense to play more aggressive attacks. The risk is that the native is killed in the process, which will cost us notoriety and keep us from our precious victory conditions.
The Black Knight vs. Two Heavy Trolls -- Round 1
This is how we are going to use Rogue 7 in this battle -- he is going to step in and take the first troll off our hands, allowing us to play an extremely aggressive attack on the second troll. To do this, R7 lures the troll in the Luring step.
To lure the troll, we simply place him on our hireling's combat sheet. Notice that we flipped R7 to his dark side. When we lure an enemy onto a hireling's sheet, we can flip him to either side. Rogue 7 has a side with a M3* attack and a 5 speed move, and another side has an L4* attack with a 4 speed move. Neither of R7's sides has an attack that can kill a troll who is heavy and armored, so we are going to play the side with the better move speed so that R7 does not get undercut and killed.
Once R7 has lured one troll, the other is deployed to our sheet. (If there were other characters in the clearing, they might have gotten attacked by the troll in the Random Deploy step.) So, R7 has a troll, as does the Black Knight. We are still going to have to withstand an attack this round, so did the native really help at all?

He actually helped quite a bit. Because we only have a single troll to worry about, we can play a highly aggressive attack in an attempt to kill the troll before he can even attack us. The first step in this attack is to play a FIGHT chit to alert our trusty mace. Unfortunately, trolls are pretty quick and so to alert our weapon, we are going to have to burn our FIGHT M3** -- using all of our effort asterisks for this round!
No need to be alarmed though. We don't need any more effort asterisks to undercut and kill our troll. The mace is a speed 3 on its alerted side, so we can play our slowest FIGHT chit, as long as it has a Heavy strength, we will hit and do enough damage to kill the hapless troll. So, we play FIGHT H6, and a MOVE H6 and the Black Knight will kill his troll this round.
As for Rogue 7, it is just a matter of not getting hit. His move speed of 4 is fast enough to not get undercut on either of the Heavy Troll's sides, so it really comes down to a 1/3 chance on a die roll to see if the troll intersects... in which case, the Rogue dies. So, in this case, it doesn't matter how we play the combatants on R7's sheet, he lives 2/3 of the time, and dies 1/3 of the time.
We roll a 6 for the reposition roll, which moves the Heavy Troll from the Thrust box, into the Smash box, and he does not flip (rolled 1/5). Our hireling stays where he is and does not flip because he lured the monster onto his own sheet. When a native is battling on his own sheet, he does not roll to reposition, or to change tactics. We control where he is played and what side he is played on. Keep this in mind, because when we deploy the native to a creature's sheet, this will change. So, R7 stays in the Charge box and the troll misses.
We have to fatigue one FIGHT asterisk because we alerted our weapon with a FIGHT M3**. We choose a FIGHT M4* because it is useless in this particular battle.
Round 2
This round is even easier than the last one. We are going to follow the same basic plan in which R7 lures the troll onto his sheet.
This round is better than the last one because the Black Knight has no enemies on his sheet and so he can alert his mace with any FIGHT chit he has. We pick a FIGHT M5, alert our mace, choose the troll as our target, and move onto the Position step.
Since he is targeting a creature on another character's sheet, the BK plays his position step on R7's sheet. If you are battling other players, you still play your moves on your own sheet, keeping your plays hidden from the others, but playing solo, on RealmSpeak, we actually play our move on R7's sheet.
Our exact positioning doesn't matter here, because we are going to undercut the Heavy Troll and kill him with a speed 3 attack. Since this is the second round of combat, our speed 3 is certain to go before the troll, and so this is an automatic kill.
Making good use of our hireling allowed our Black Knight to kill two heavy trolls by spending a single asterisk in fatigue. Could he have won that battle alone? Certainly, we could have even played our aggressive strategy, but it would have cost us 2 fatigued asterisks, a wound, and possibly a damaged or destroyed shield, or a damaged suit of armor... and Rogue 7 isn't even that cool a hireling!
And to keep the concept of hiding (from the previous post in this series) fresh in your head... if the BK and R7 started the combat hidden, can you think of how you would play the battle to kill both trolls and take no fatigue or damage?
Quick tutorial today... we are going to battle with some natives on our side and talk about luring, deploying and battling on multiple sheets. Like last post, I am going to use RealmSpeak to manage the fight, which will make it a little easier on me... at the expense of being able to control the rolls. We'll see how it goes.
For the first battle, we are going to pit the Black Knight against two Heavy Trolls. This is a pretty good fight for the BK, though I would expect him to take a hit or two if he starts the battle unhidden. With a hireling, we should fare a little better. Let's give the BK a rogue companion and see how we can use him.
One way we can use hirelings is to lure enemies onto their combat sheet, tricking the monsters into attacking them instead of us. Every hireling you have can lure a single enemy to his sheet each combat round. Having a native lure an enemy can save us wounds and fatigue, and to allow us to ignore our defense to play more aggressive attacks. The risk is that the native is killed in the process, which will cost us notoriety and keep us from our precious victory conditions.
The Black Knight vs. Two Heavy Trolls -- Round 1
| Round 1 -- Luring Step |
| Round 1 -- The lured troll goes on R7's sheet, not ours |
Once R7 has lured one troll, the other is deployed to our sheet. (If there were other characters in the clearing, they might have gotten attacked by the troll in the Random Deploy step.) So, R7 has a troll, as does the Black Knight. We are still going to have to withstand an attack this round, so did the native really help at all?

He actually helped quite a bit. Because we only have a single troll to worry about, we can play a highly aggressive attack in an attempt to kill the troll before he can even attack us. The first step in this attack is to play a FIGHT chit to alert our trusty mace. Unfortunately, trolls are pretty quick and so to alert our weapon, we are going to have to burn our FIGHT M3** -- using all of our effort asterisks for this round!
No need to be alarmed though. We don't need any more effort asterisks to undercut and kill our troll. The mace is a speed 3 on its alerted side, so we can play our slowest FIGHT chit, as long as it has a Heavy strength, we will hit and do enough damage to kill the hapless troll. So, we play FIGHT H6, and a MOVE H6 and the Black Knight will kill his troll this round.
| Round 1 -- Position Step, our sheet |
| Round 1 -- Position Step, R7's sheet |
We have to fatigue one FIGHT asterisk because we alerted our weapon with a FIGHT M3**. We choose a FIGHT M4* because it is useless in this particular battle.
Round 2
This round is even easier than the last one. We are going to follow the same basic plan in which R7 lures the troll onto his sheet.
| Round 2 -- Luring the troll onto R7's sheet |
| Round 2 -- Position Step, R7's sheet |
Our exact positioning doesn't matter here, because we are going to undercut the Heavy Troll and kill him with a speed 3 attack. Since this is the second round of combat, our speed 3 is certain to go before the troll, and so this is an automatic kill.
| Round 2 -- Results |
And to keep the concept of hiding (from the previous post in this series) fresh in your head... if the BK and R7 started the combat hidden, can you think of how you would play the battle to kill both trolls and take no fatigue or damage?
Subscribe to:
Posts (Atom)